When creating merchandise for a younger demographic or a nostalgic audience, finding a typeface that feels playful and bold is essential. The Girly Pop Font delivers exactly that aesthetic. With its thick, bubbly curves and retro-inspired weight, this display typeface stands out immediately on everything from tote bags to digital thumbnails. For print-on-demand sellers and creative hobbyists, having a reliable, eye-catching lettering style can drastically reduce the time spent searching for the right vibe. Whether you are designing for a boutique brand or making custom gifts, the right typography sets the entire tone of your project.
What makes a retro bubble typeface work for merchandise?
Bubble letters have made a huge return in recent years. They tap into Y2K nostalgia and early 2000s pop culture, making them highly appealing for Gen Z apparel, phone cases, and stationery. The thick strokes ensure that text remains highly readable even when scaled down for laptop stickers or embroidered onto small fabric patches. Because the letters are so chunky, they also hold up incredibly well during the screen printing process, preventing ink from bleeding into tiny, fragile serifs that often plague thinner, more traditional typefaces. This durability makes it a favorite among small business owners who produce physical goods.
How can crafters and small businesses use this lettering style?
If you run a small craft business, having versatile assets helps keep your product line fresh. You can use this specific lettering to create a wide array of items:
- Vinyl decals for water bottles, car windows, and notebook covers.
- Bold, colorful typography for greeting cards and party invitations.
- Catchy, readable slogans for oversized graphic tees and hoodies.
- Custom, friendly branding for beauty, jewelry, or accessory lines.
If you want to see how this style fits into a broader collection, checking out more display options in the Girly Pop collection can give you fresh ideas for seasonal projects. The rounded edges give any product an approachable feel that customers naturally gravitate toward when shopping online or at local craft fairs.
Which other typefaces pair well with a bold bubble aesthetic?
Relying on just one typeface can make your product catalog look repetitive over time. To create dynamic layouts, you need contrasting fonts that balance the heavy visual weight of bubble letters. Pairing your main text with a clean, simple sans-serif keeps the overall design grounded and easy to read. If you want to lean further into the playful aesthetic, browsing different display typefaces for branding can help you find complementary assets for secondary text.
For a sunny, cheerful contrast, you might try a cheerful alternative like Sunday Bright for your subheadings or background elements. On the other hand, if you are designing edgy streetwear and want to juxtapose the cute bubble letters with something raw, looking into urban street writing typefaces provides a striking visual clash. You can also explore Stay Funky for a retro vibe when you need a groovy, vintage script to accompany your bold titles on posters or album art.
What are the best settings for cutting bubble letters with a vinyl plotter?
Working with thick fonts on a Cricut or Silhouette machine requires a bit of preparation. Because the letters are naturally wide, they are generally much easier to weed than thin, cursive scripts. However, you should always use the weld tool in your design software before sending the file to cut. Welding merges overlapping letters into a single continuous shape, preventing the machine from cutting out the internal overlaps and ruining your decal.
Additionally, pay close attention to your kerning. Bubble letters often need slightly tighter spacing to look cohesive as a single word. If you leave too much space between characters, the phrase can look disconnected and awkward. Taking the extra minute to manually adjust the spacing ensures a professional finish for your custom vinyl projects.
How should you prepare your files before final export?
Before you finalize your merchandise design or send it to the cutting machine, run through this quick preparation list to avoid common production errors:
- Convert to outlines: Always change your text to vector shapes to ensure the typography displays correctly on any device, operating system, or printing software.
- Weld overlapping characters: Merge connected letters into one solid path for clean, frustration-free vinyl weeding.
- Check color contrast: Ensure your thick letters stand out clearly against the background color of your shirt, mug, or tumbler.
- Test a small print: Print a scaled-down version on standard paper to verify that the internal spaces of the letters remain legible before committing to expensive materials.
 Vintage Varsity Font Ideas for Retro Designs
 Street Writing Font Inspiration for Urban Design
 Groovy Melt Font: Retro Style for Creative Projects
 Thick Honey Duo Font: Bold Typography for Sweet Brands
 Elevate Your Designs with the Perfect Designer Font
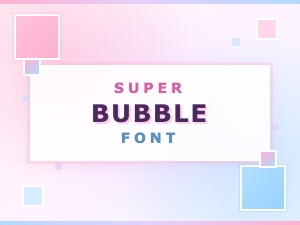 Super Bubble Font for Playful Design Projects